
In the last Intro to CSS post, we looked at how to identify selectors that you can target in your theme. Remember, a selector is the code a site uses to make changes to how things display.
Today, we’re going to explore one particular part of the Developer Tools, the Matched CSS Rule pane, and see how you can use it identify declarations and start tinkering with your site. A declaration is the part of the CSS rule that tells the CSS what to do — make this font bigger! Change the background color! The Matched CSS Rule pane shows us how selectors are currently being used on the site, which can teach you what kinds of declarations you can use, show you why your declaration might not be working, and let you preview CSS edits on your site.
Are you a blogger who loves tinkering with themes and wants their site to look just so? Explore our different WordPress.com plans — some, like the Premium plan, come with advanced customization options and unlimited premium themes.
Finding and Using the Developer Tools
To begin with, you’ll need to find your browser’s developer tools (dev tools). All the major browsers come with dev tool that will let you view the code for the page. You can use a tool like Firebug (a download that is made for Firefox), or Chrome’s built-in Developer Tools. In this post, I’ll run through an example using Chrome.
Here’s a quick guide to finding the dev tools in a few browsers:
- Chrome: Access the browser tool via the browser menu: go to View > Developer > Developer Tools. Want a shortcut? The quickest way to access the dev tools in Chrome is to press alt+ctrl+i on a PC or alt+command+i on a Mac.
- Firefox: Download Firebug. Then, open the dev tools by hitting your F12 key on a PC, or by going to Tools > Web Developer > Firebug > Open Firebug on a Mac — on both you can just click on the Firebug icon in the top right of your browser window.
- Internet Explorer: Download the dev toolbar and install it. Then, access the tools using your F12 key.
Each view will be a little different than the one below, but the key things we’ll look at will be the same. We are going to focus on the Matched CSS Rule tab, which is highlighted:
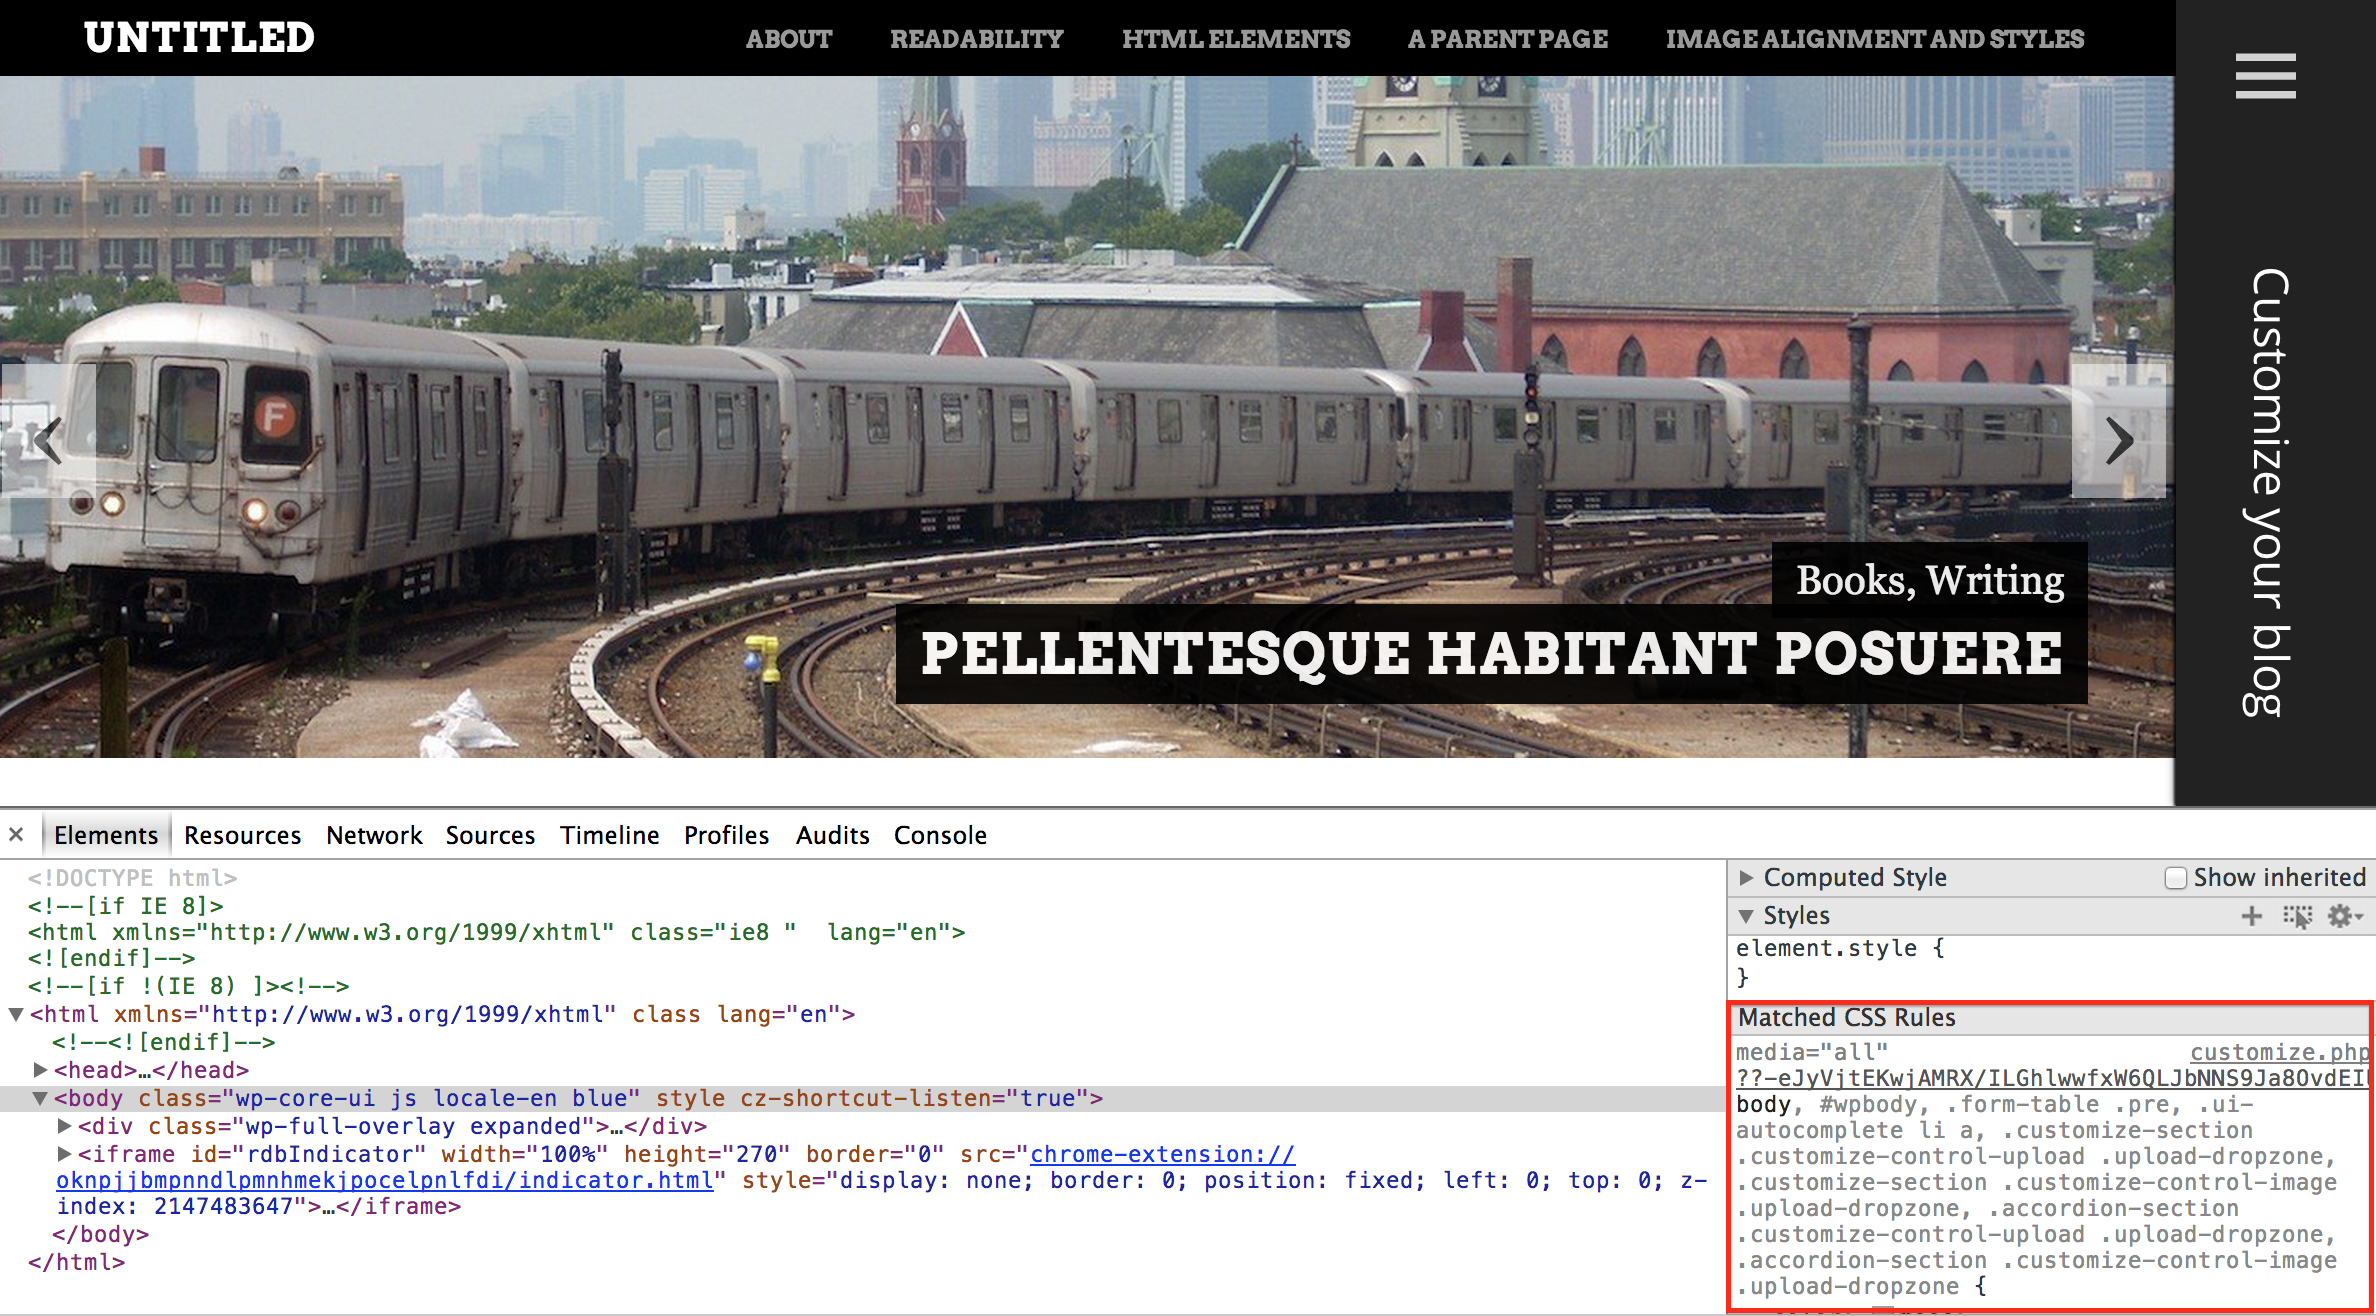
The webpage with the dev tools opened up in Chrome.
One CSS Selector to Rule Them All
Sometimes, you make a CSS change and… nothing happens. You know the declaration is correct — you’ve seen it in action before — but the thing you wanted to change didn’t change. Often, your selector is too broad — what tried to target isn’t specific enough.
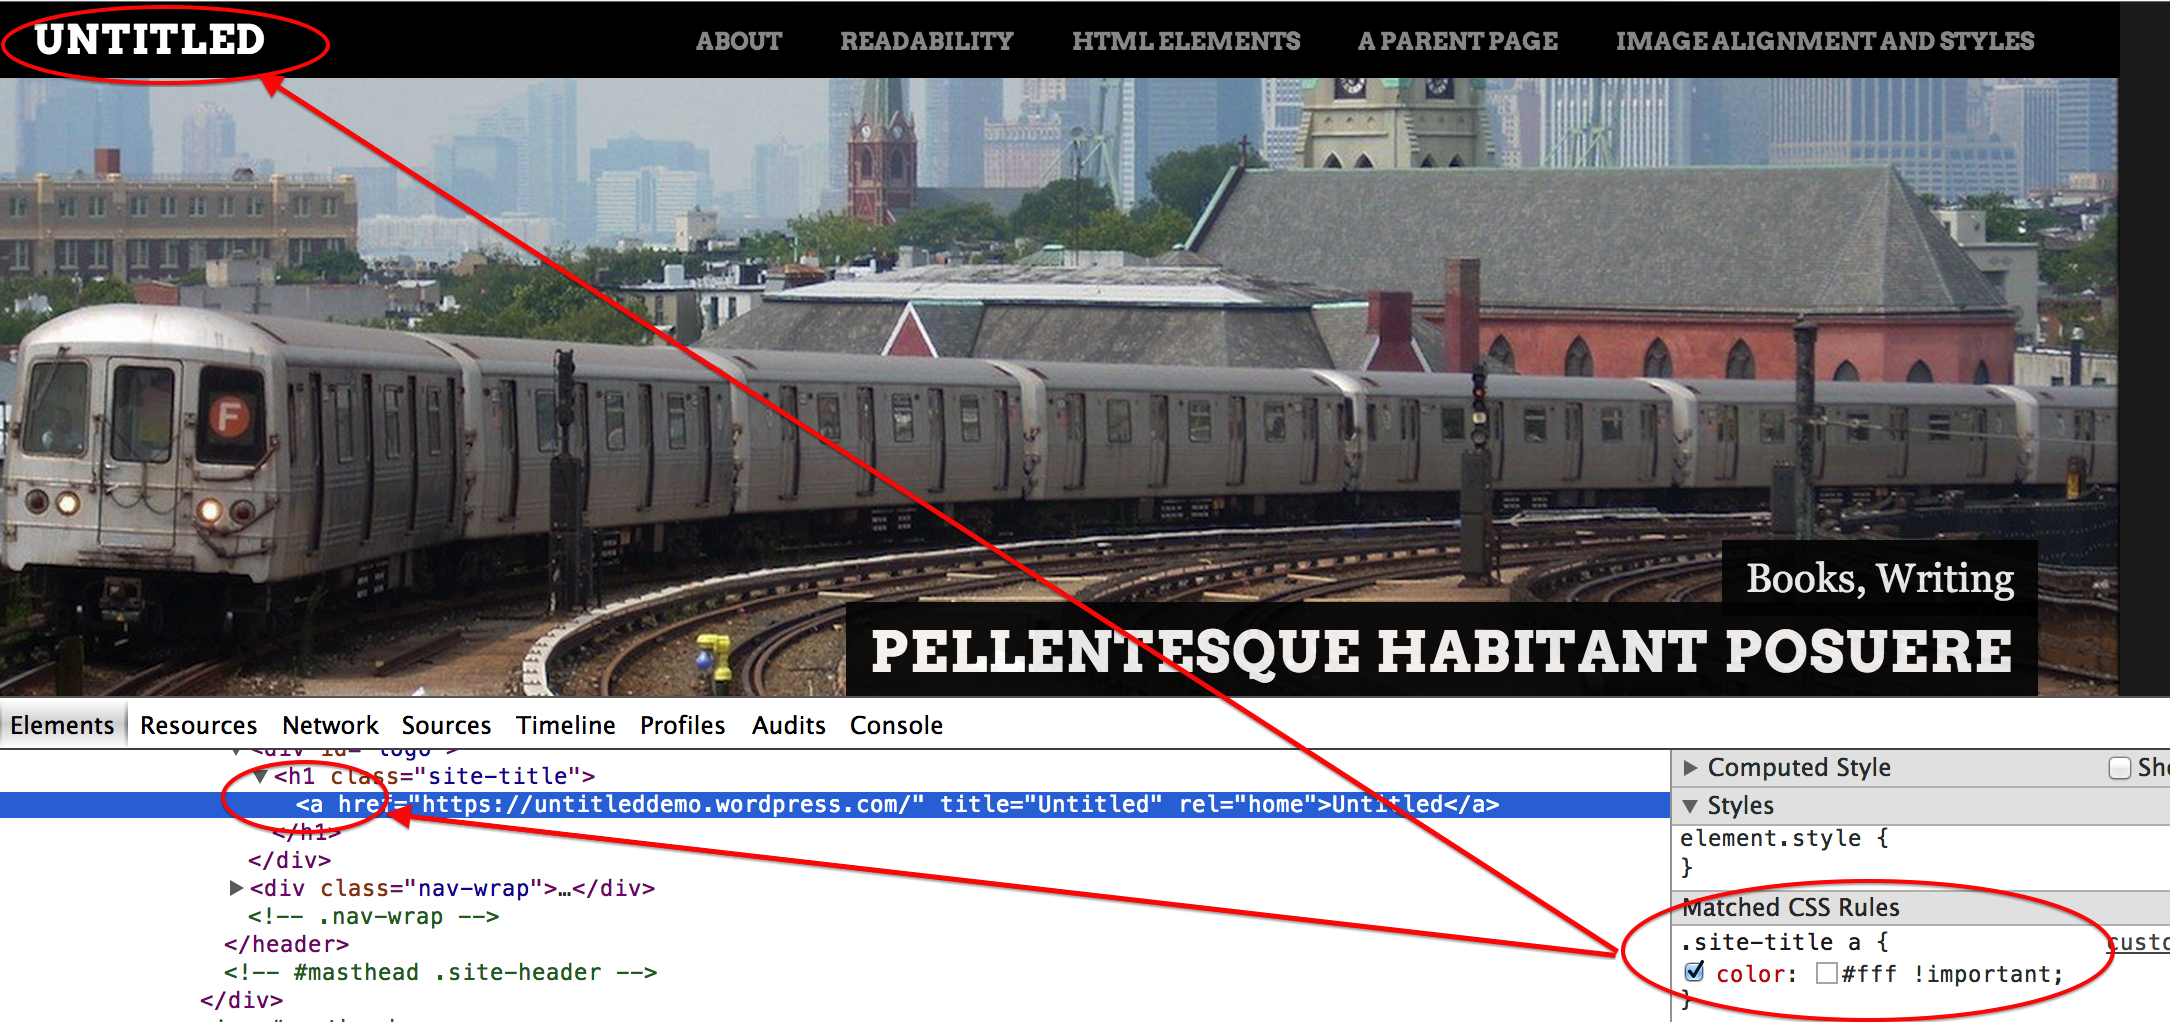
Here’s an example looking at a blog using the Untitled theme (but you can experiment with any theme!). On this blog, the user set his headings to be white:
But when we look at the site, we can see that the site title and the post titles aren’t showing up in white.
Time to check the Matched Rules pane!
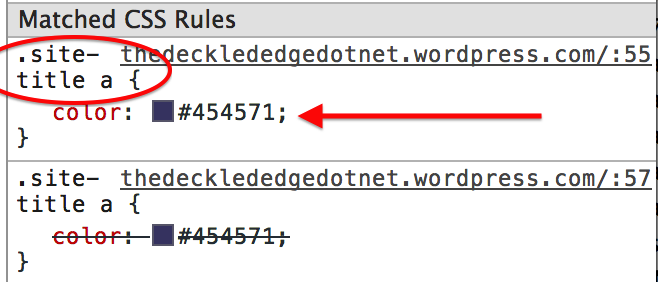
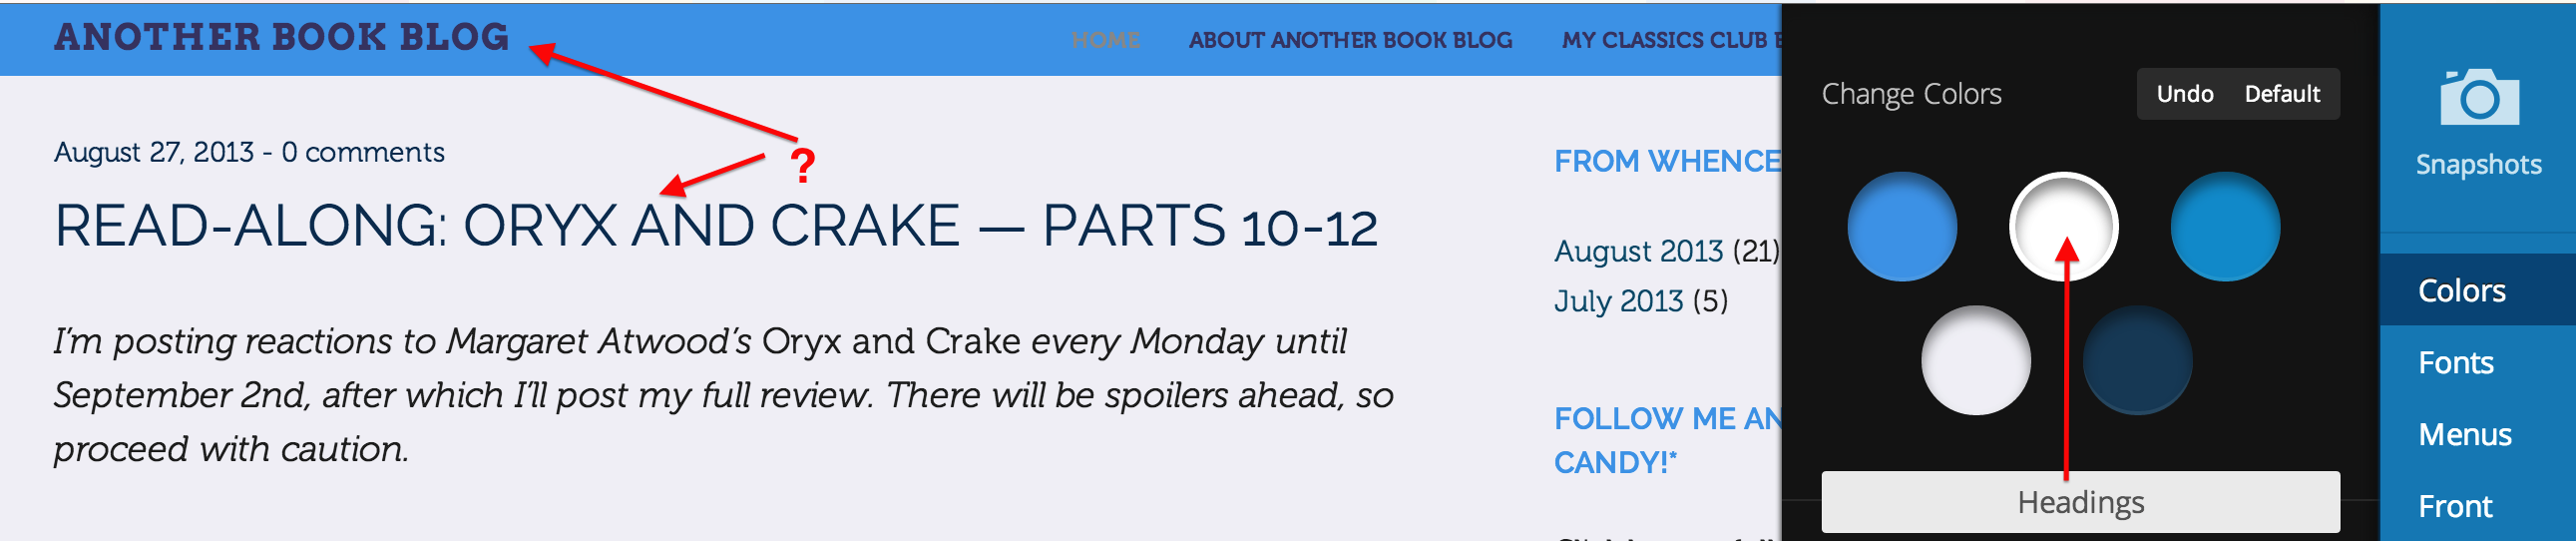
Here we can see that the site title color is being controlled by “.site-title a.” (The “a” means that this is a rule set for the site title when it is also a link (a = “anchor link”).) So now I know that I want to target “.site-title a” in order to specifically change that header.
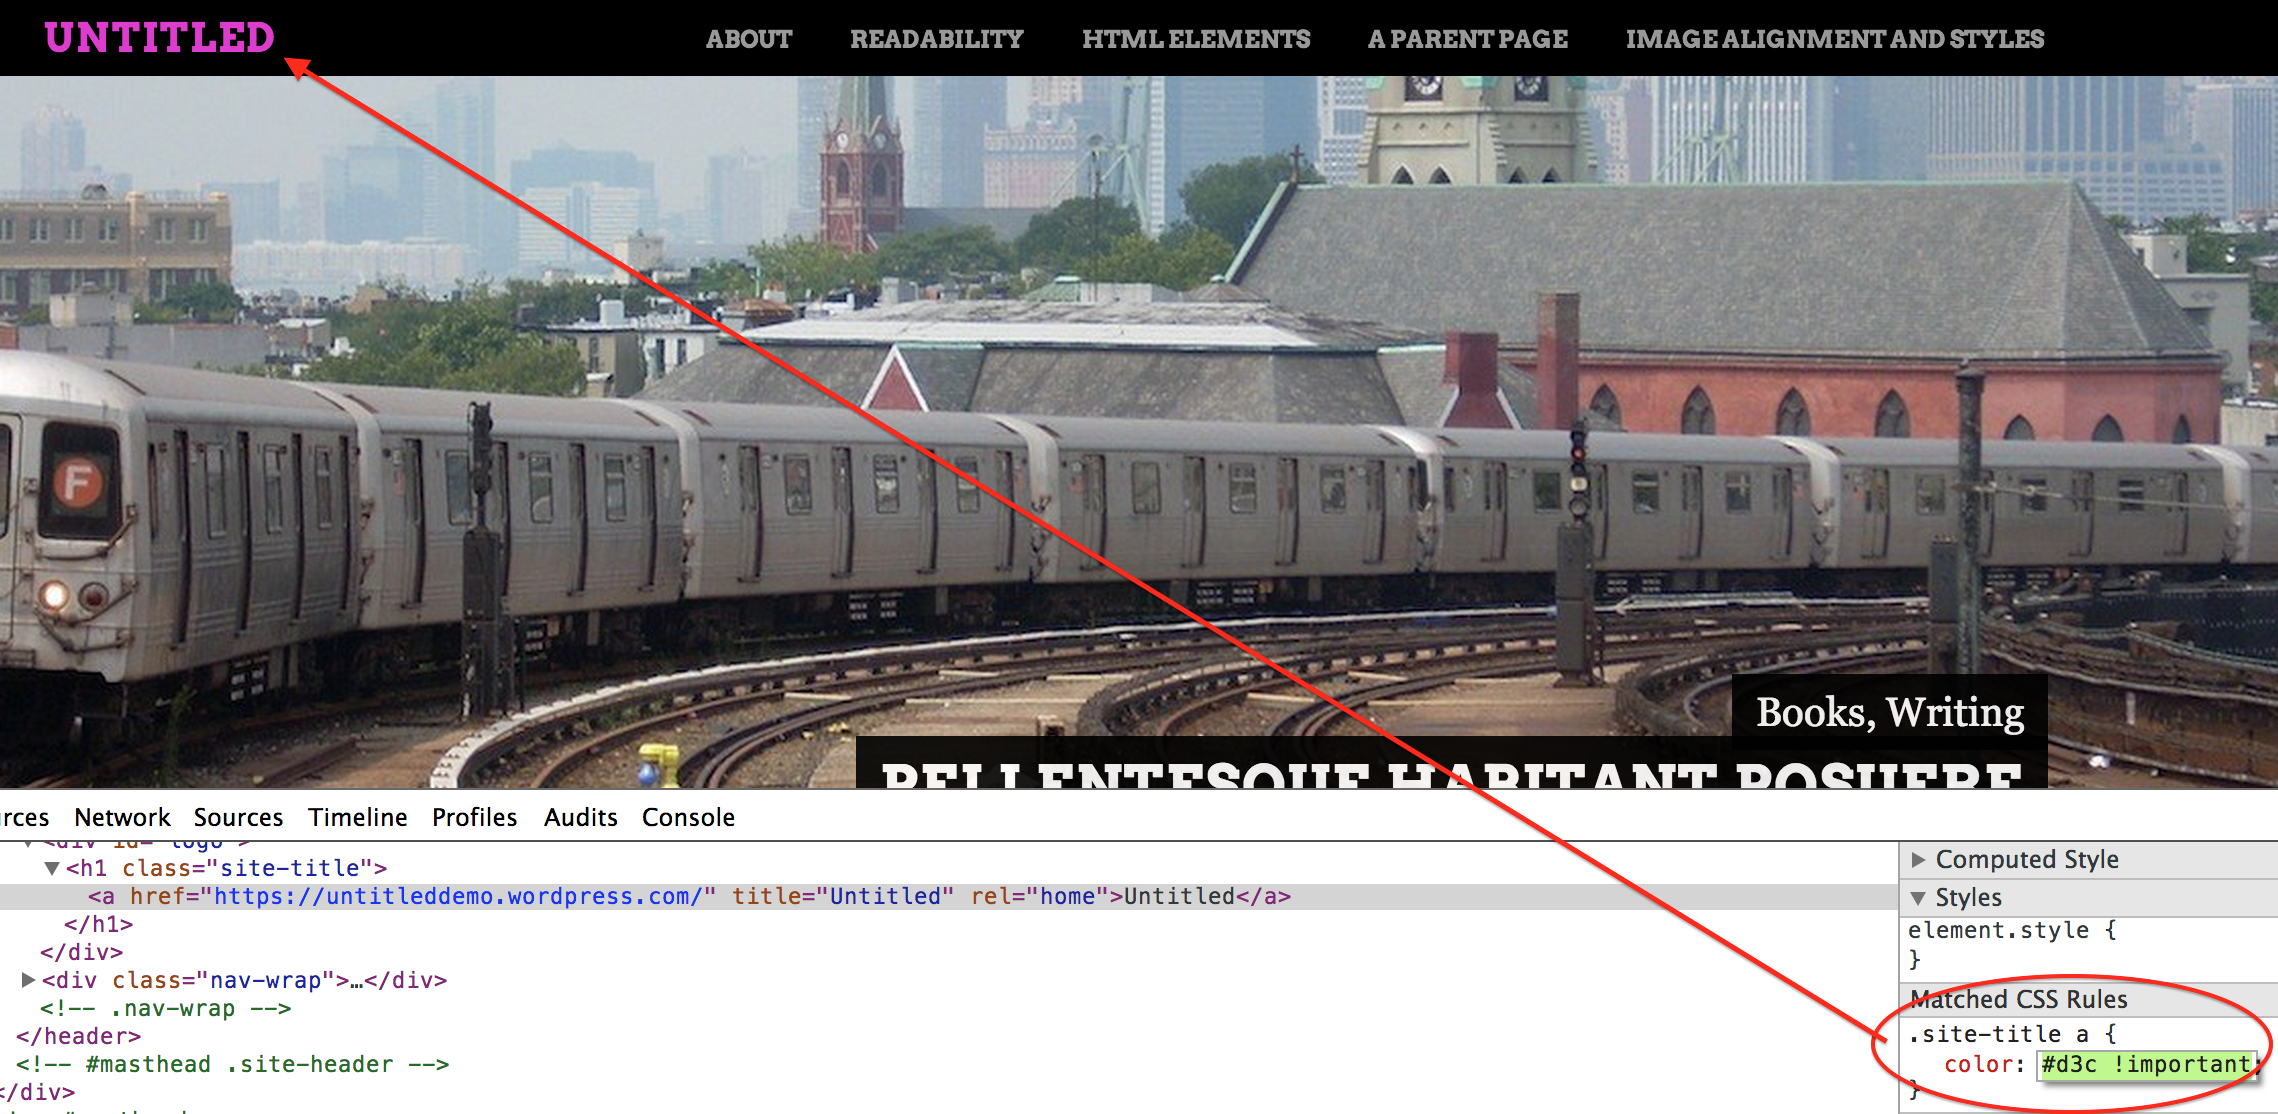
Now, I can add some CSS that targets that specific rule. In this case, by adding “.site-title a {color: #ffffff;}” to my CSS tab in the Customizer, I can preview the effect.
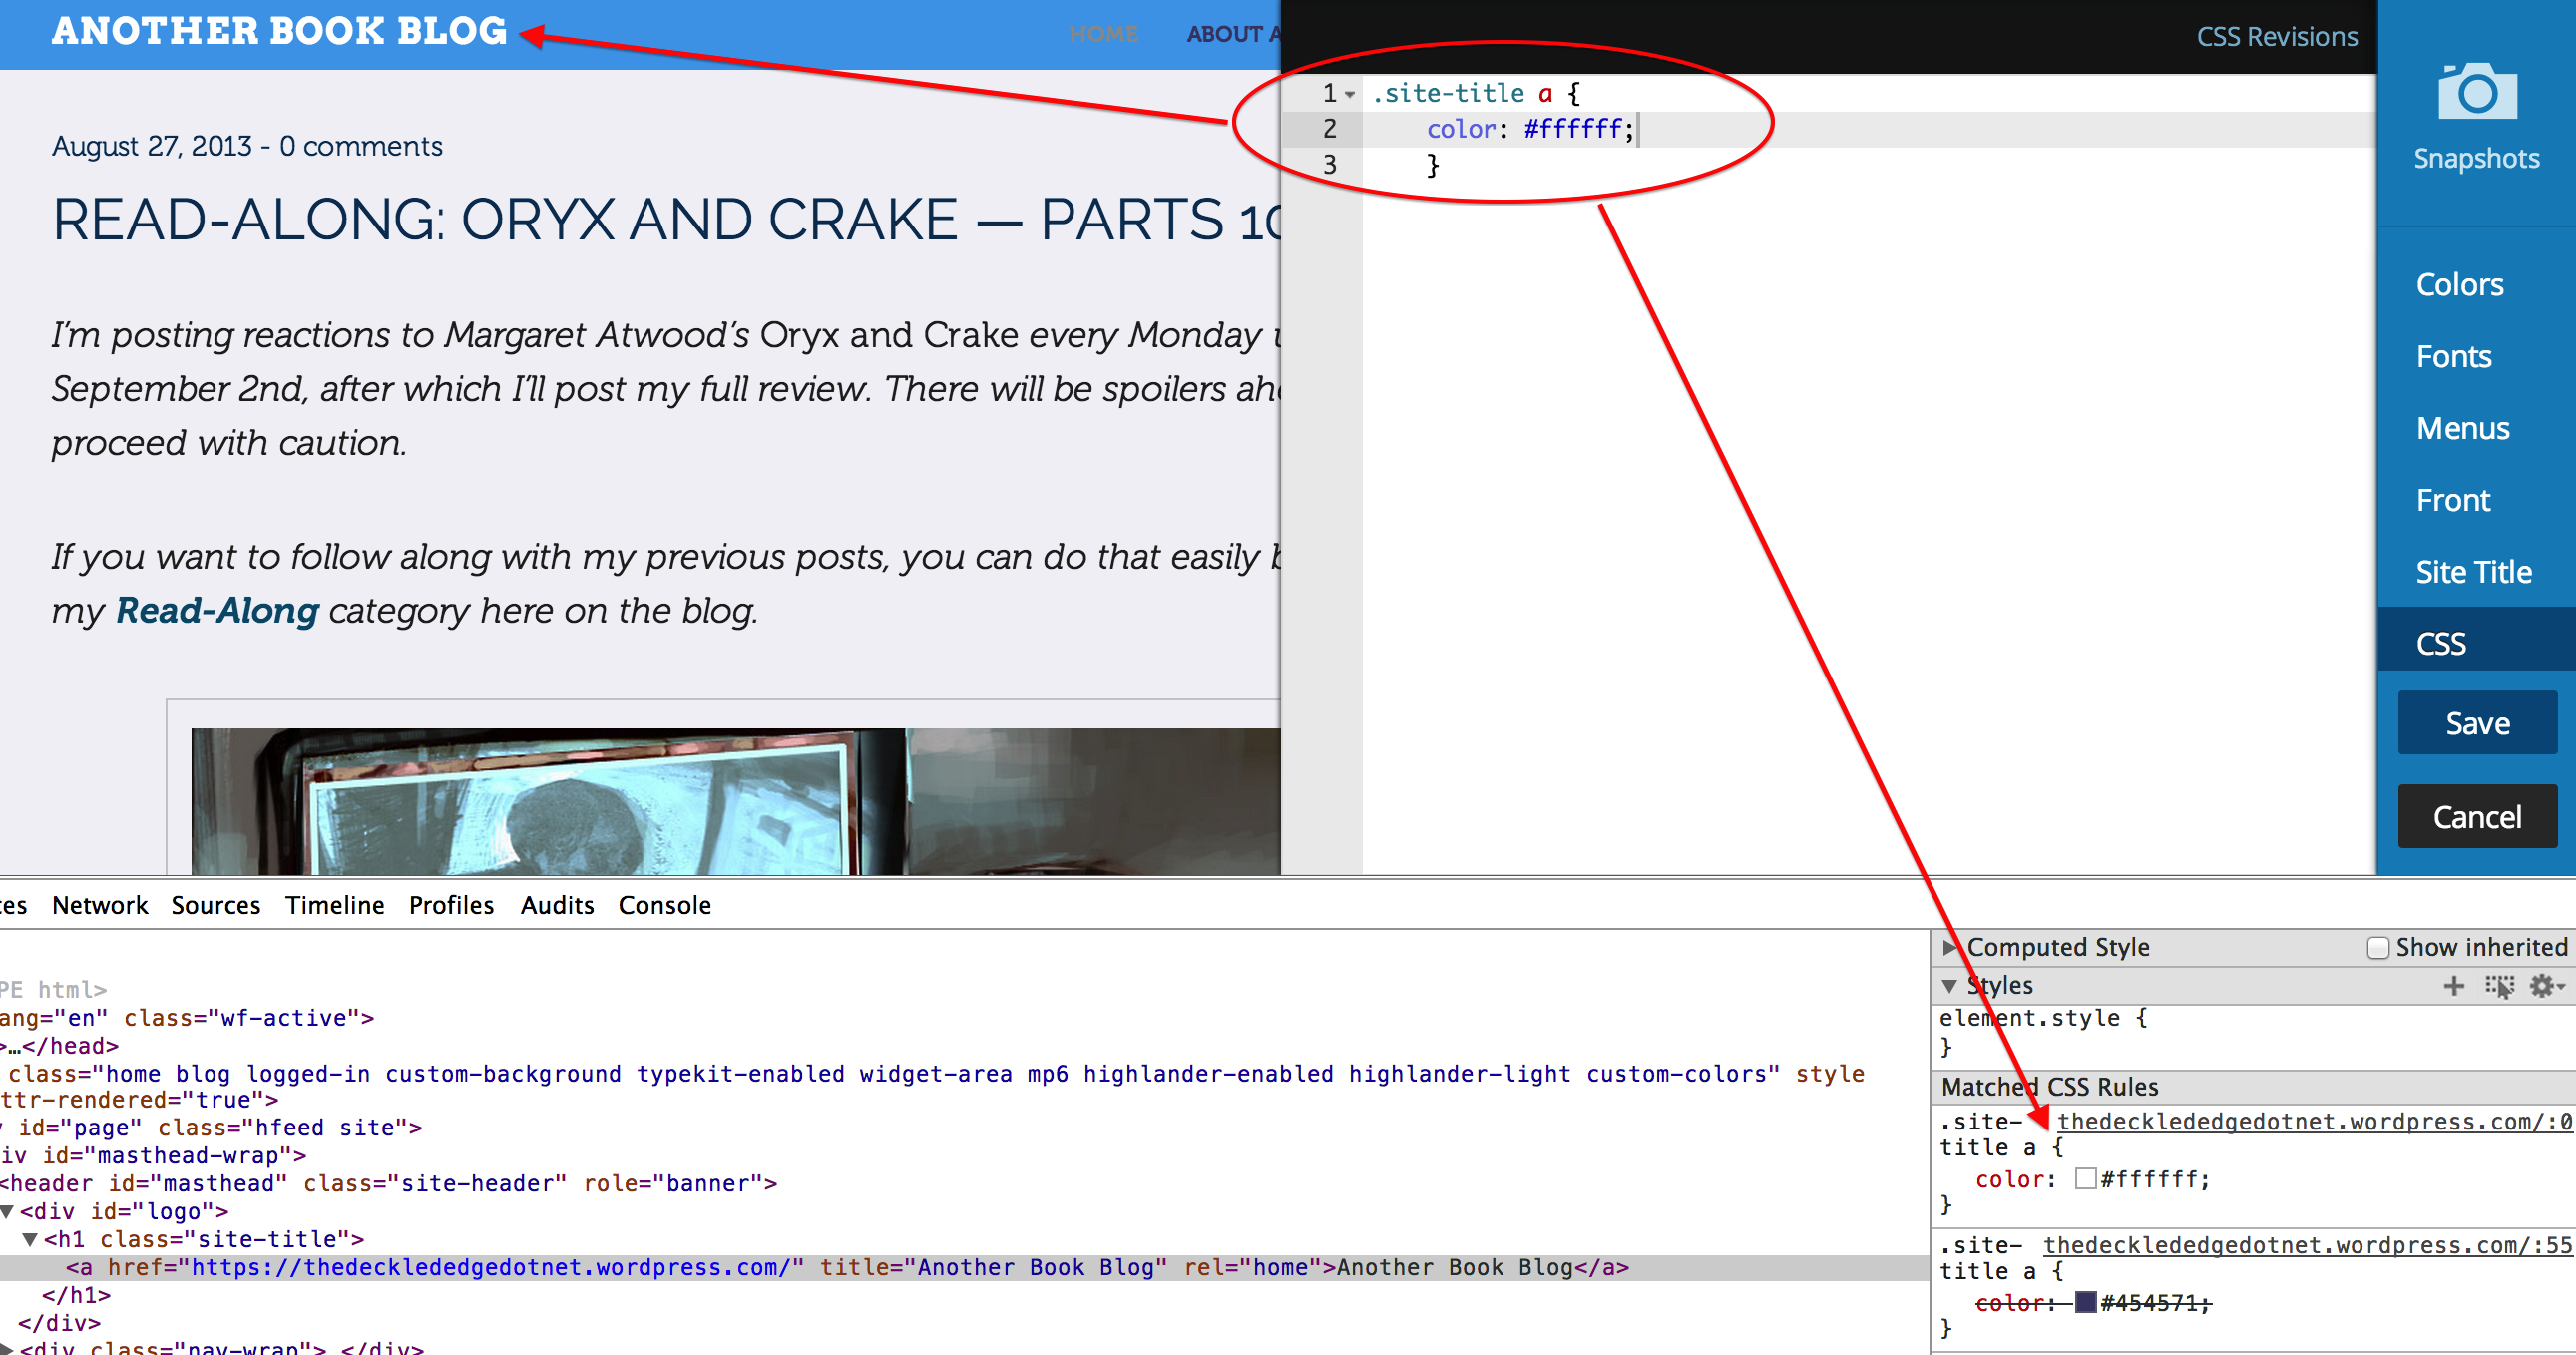
I didn’t save the rule yet, so I can only see the change in my preview, not my actual site, but I can see the Matched CSS Rules pane updated to include my new rule.
Making changes in the Matched CSS Rule pane
So far, we’ve been able to make these changes because the Custom Design upgrade gives us access to the CSS tab. Maybe you’d like to test some changes before you purchase that upgrade. We can do that with the — you guessed it! — the Matched CSS Rule pane. Note that changes made in the Matched CSS Rules pane are preview-style only; you are the only one who can see them, and they will revert when you refresh your screen.
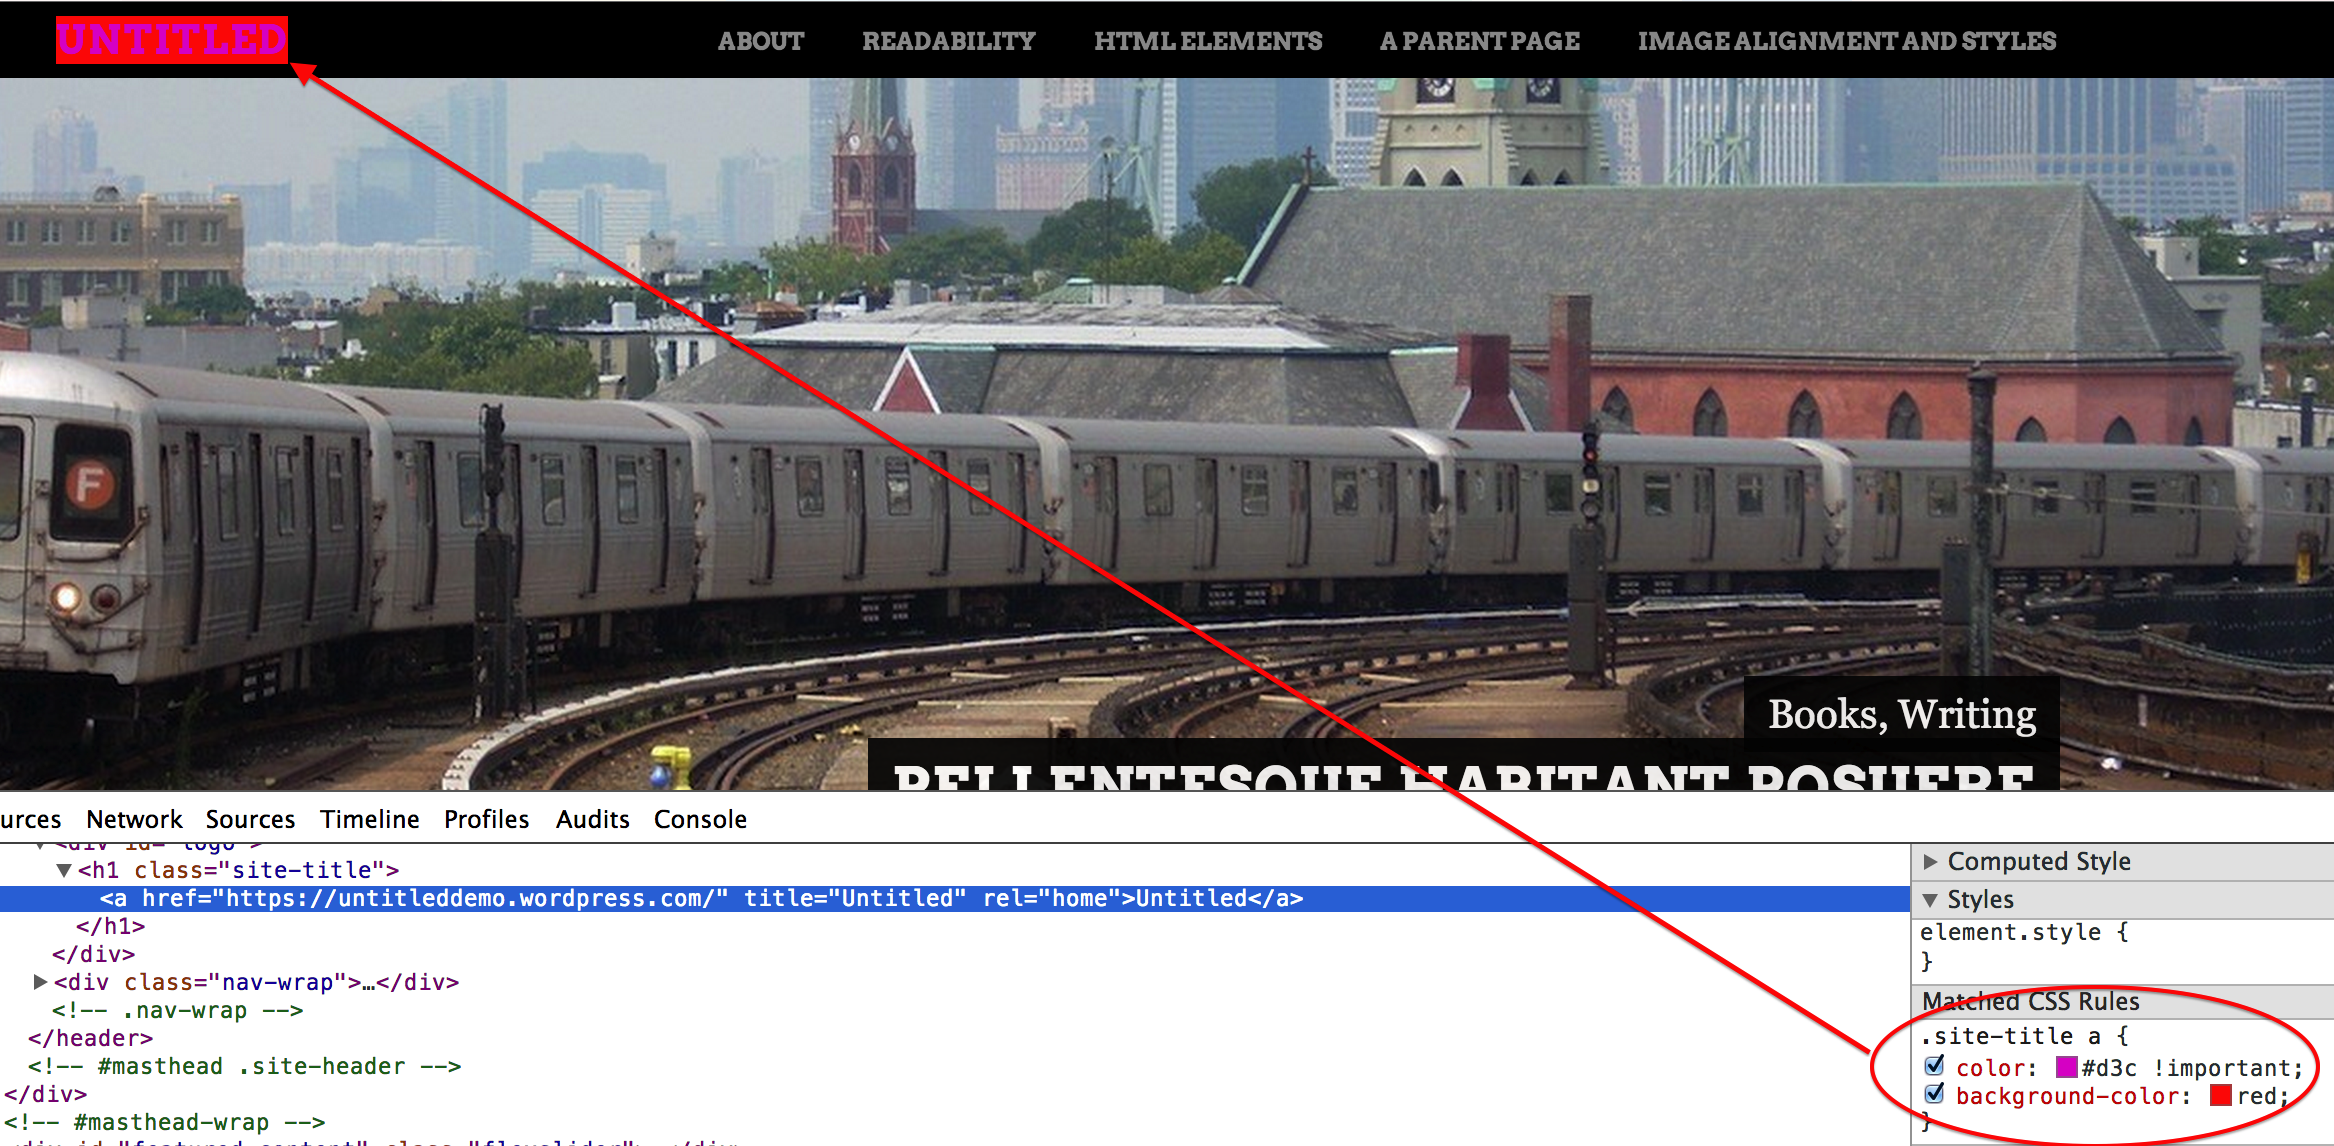
The Untitled Demo site has all the defaults set, and no Custom Design upgrade, so we’ll do our testing there.
In this image, you can see that I’ve targeted the site title.
As you can see, the CSS rule itself is:
.site-title a {color: #fff !important;}
You can actually change the rule right in the pane. Click on an existing rule to bring up an editable field:

Then, just make the edit you’d like to make. In the example below, I changed the color from white (#fff) to pink (#d3c):
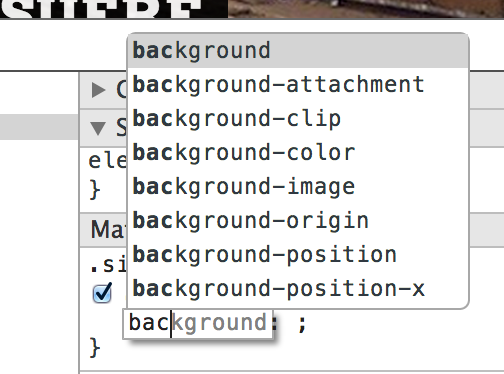
You can also click at the end of a rule to add a new row for a new rule:

You would want to add a row if you didn’t just want to modify the existing rule, but actually wanted to add a new rule. For example, you may want to add a background color, as in this case:
In the Chrome dev tools, adding a new rule will give you auto-fill options — a great way to find out what your options are and experiment with! In this case, I began typing “bac” and then saw the “background-color” option, which is the one I wanted:
By playing with the Matched CSS Rule pane, you get a sense for what CSS is currently at work on your blog, what kinds of changes you can make (and how), and dip your toes into the CSS pool before committing to the Custom Design upgrade. It’s a great (and free!) learning tool that can help you understand what’s going on under the hood of your blog
If you’d like some additional resources on editing CSS, browse our support page on Custom CSS, and don’t forget to check out the recommended resources at the bottom. And if there’s a particular CSS example you’d like to learn more about, let us know!
YOU MIGHT ALSO ENJOY THESE RELATED POSTS
Currently blogless? You’re a click away from sharing your story.
Create your blog at WordPress.com


Im a freshman graphic designer, but now my interest shifted to web design and this is perfect…….
LikeLike
This is how a small CSS tutorial focusing on browser tools should be written. Excellent.
LikeLike
Reblogged this on mizzrivera77's Blog and commented:
Love that cup! It’s so hard to find the letter Z
LikeLike
I think even I can understand your explanation! Where do I find which colors use which codes?
LikeLike
Try a site like this one:
http://www.color-hex.com/
You just find a color that suits you, and copy-paste the hex code, including the hash!
LikeLiked by 1 person
Thanks!
LikeLike
I think its same as ‘Inspect Element’ in Chrome…
LikeLike
That cup 🙂
LikeLike
Reblogged this on meganbouchillon.
LikeLike
Reblogged this on wasehjosephine.
LikeLike
Reblogged this on Info for everyone and commented:
Great tips……..
LikeLike
Reblogged this on Hazara.
LikeLike
Reblogged this on Mannyspage.
LikeLike
Reblogged this on Griya Sekar.
LikeLike