
Last month, we introduced a series on CSS (Cascading Stylesheets) and talked a bit about how you can use CSS to make your site look just the way you want.
Today, let’s dive back in!
Are you a blogger, a freelancer, or a business owner? Do you love tinkering with design and want your site to look just so? Explore our different WordPress.com plans — some, like the Premium plan, come with advanced customization options and unlimited premium themes.
What’s a selector, and why do I need it?
After reading the last Intro to CSS post, you may have been left wondering how to find CSS selectors to target on your site. A selector is the code a site uses to make changes to how things display. In this post, we’ll look at how to find these selectors in any theme.
To quickly recap the last post, we looked at hiding post meta data (the timestamp and author) and found that in the Twenty Twelve theme, the post meta data is targeted with the selector “footer.entry-meta” — but this changes with different themes. When you know what selector to use, you can target it with CSS to change how it displays, so knowing the right selector is important.
Using the developer tools to find what you need
All the major browsers come with a developer tool (dev tool) that will let you view the code for the page. You can use a tool like Firebug (a download that is made for Firefox), or Chrome’s built-in Developer Tools. In this post, I’ll run through an example using Chrome.
Here’s a really quick guide to finding the dev tools in a few browsers:
- Chrome: Access the browser tool via the browser menu: go to View > Developer > Developer Tools. Want a shortcut? The quickest way to access the dev tools in Chrome is to press alt+ctrl+i on a PC or alt+command+i on a Mac.
- Firefox: Download Firebug. Then, open the dev tools by hitting your F12 key on a PC, or by going to Tools > Web Developer > Firebug > Open Firebug on a Mac — on both you can just click on the Firebug icon in the top right of your browser window.
- Internet Explorer: Download the dev toolbar and install it. Then, access the tools using your F12 key.
Each view will be a little different than the one below, but the key things we’ll look at will be the same.
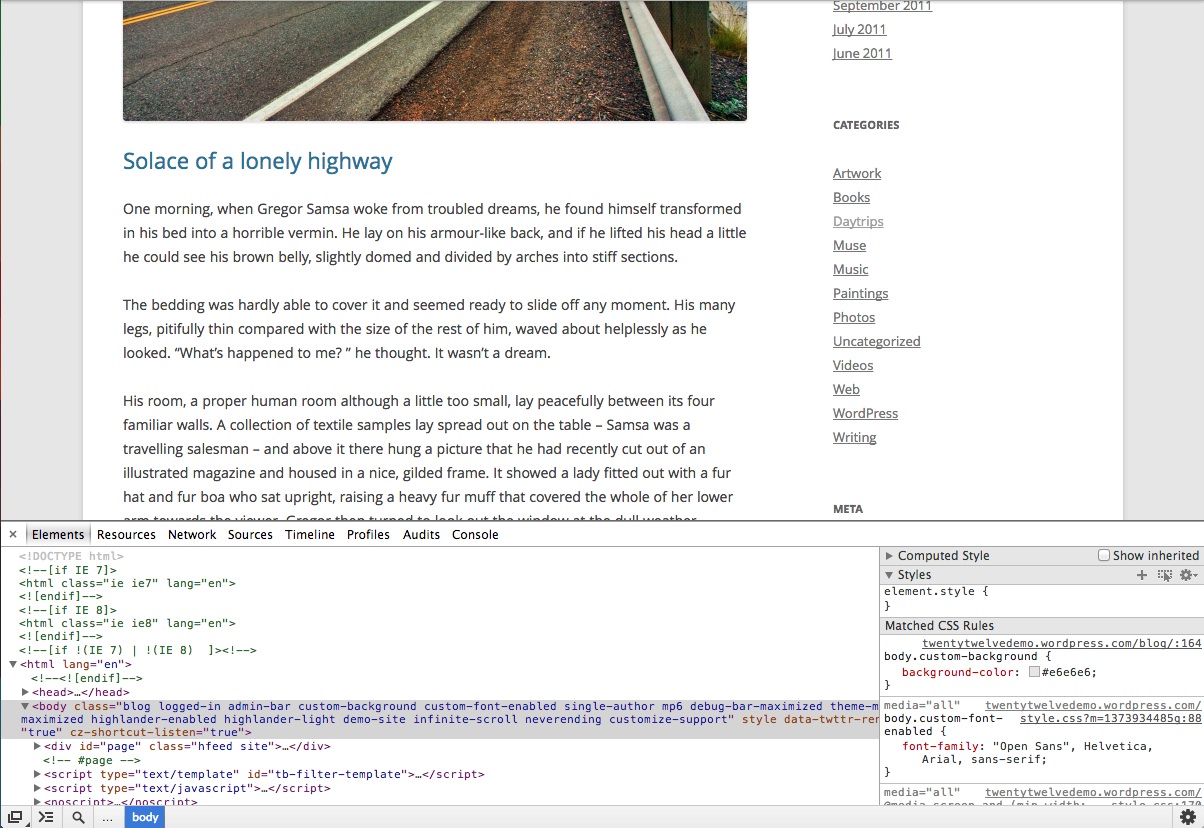
The webpage with the dev tools opened up in Chrome.
There’s a lot to see here — and a lot you can look up! To keep this simple, let’s look at the Element tab (the default tab).
Most dev tools include some kind of magnifying glass icon:
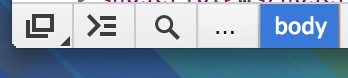
Enable the magnifying glass by clicking on it. Then, mouse over the page — the CSS selectors in use will appear in a few different places:
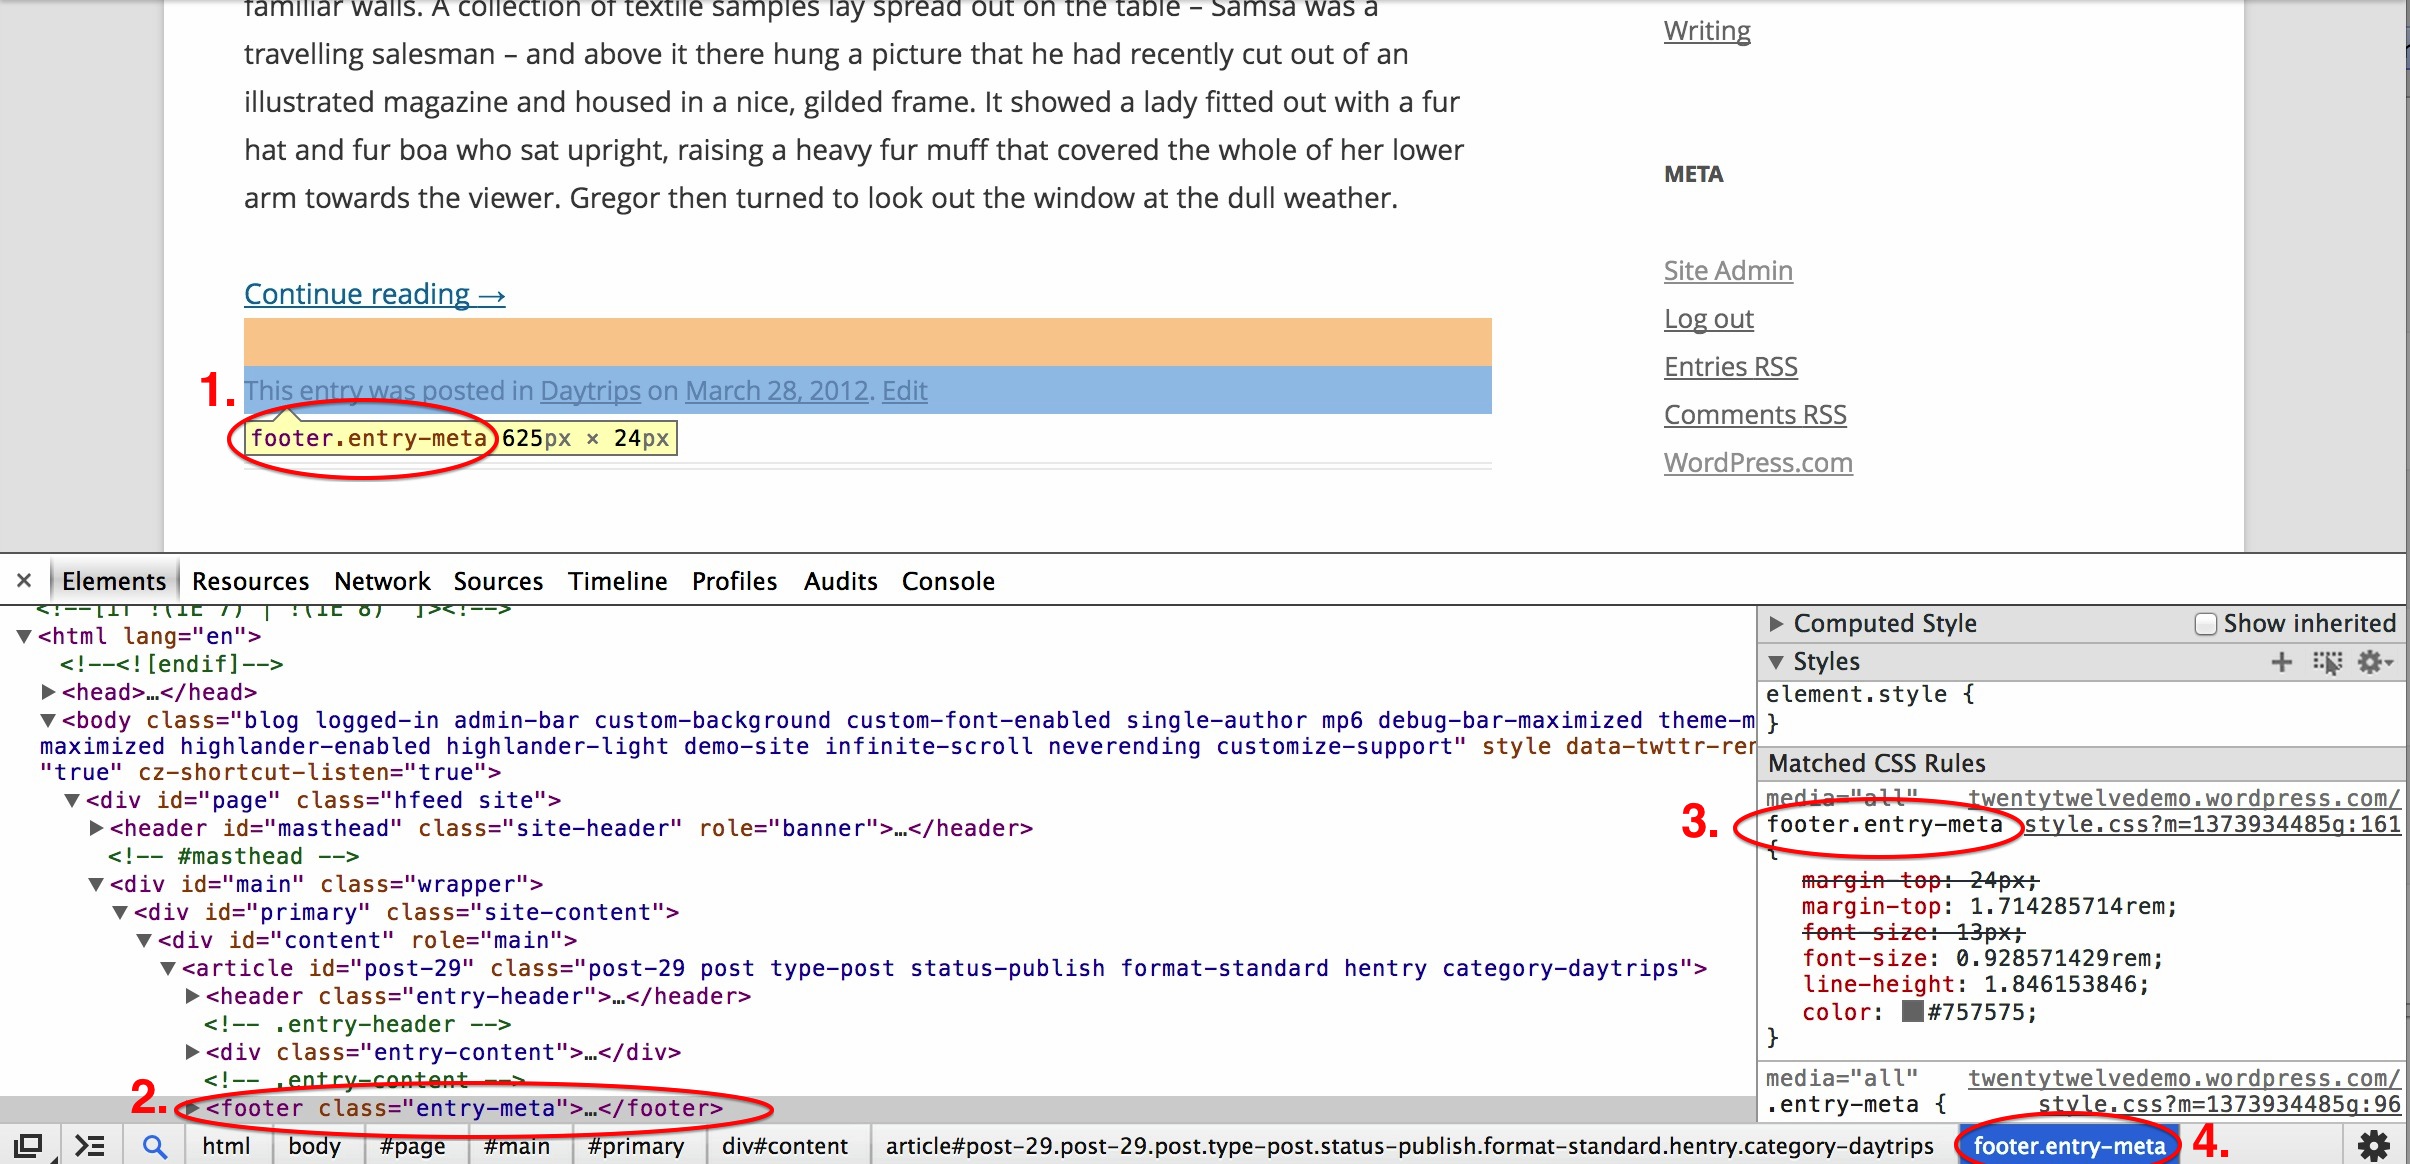
- Notice that the element itself highlights (the blue is the actual size of the element, the orange is the padding around the element). You can see the element width and height in pixels (1).
- The next place you can see the selector name is in the Element Inspector itself (2). If you’re not familiar with HTML and CSS, this is a great place to start and poke around! This shows the selector as it appears in the code of the page itself.
- The third place you can see the selector is in the Matched CSS Rules pane (3). We’ll talk about the Matched CSS Rules pane again in the next article.
- Finally, you can see the chain of all the active selectors above that element (4).
Note: “Element” is another way to describe an item on your page you want to change or style. The “selector” is the code the website uses to describe that element to the code. If we imagined that your website is your apartment, then an element could be your couch. The selector for your couch would be the serial number — it’s a specific way to identify the element.
Finding the right element to test in your CSS tab is easy — when you know where to look! Let’s search for one more selector together. Perhaps you’d like to change the alignment of your post titles from left to right, but you’re not sure what to target. Once again, I’ll use Chrome and the Twenty Twelve theme, but give this a try on your theme! Note that the declaration we’ll use is text-align: right. You’ll be able to see that in action below.
Here are some steps to run through:
- First, go to one of your posts so you can see the post title.
- Pop open your dev tools (in Chrome on a Mac, I hit command+option+i).
- Click on your magnifier icon.
- Run your cursor over the post title (tip: move your mouse until you see an area larger than the letters themselves highlight — you don’t want to target the “a” tag in this example).
- When you see the post title area highlight, click your mouse once to “freeze” the magnifying action so you can use the mouse without losing the selector.
- Identified! Now to plug it in!
And here is what I found in Twenty Twelve:
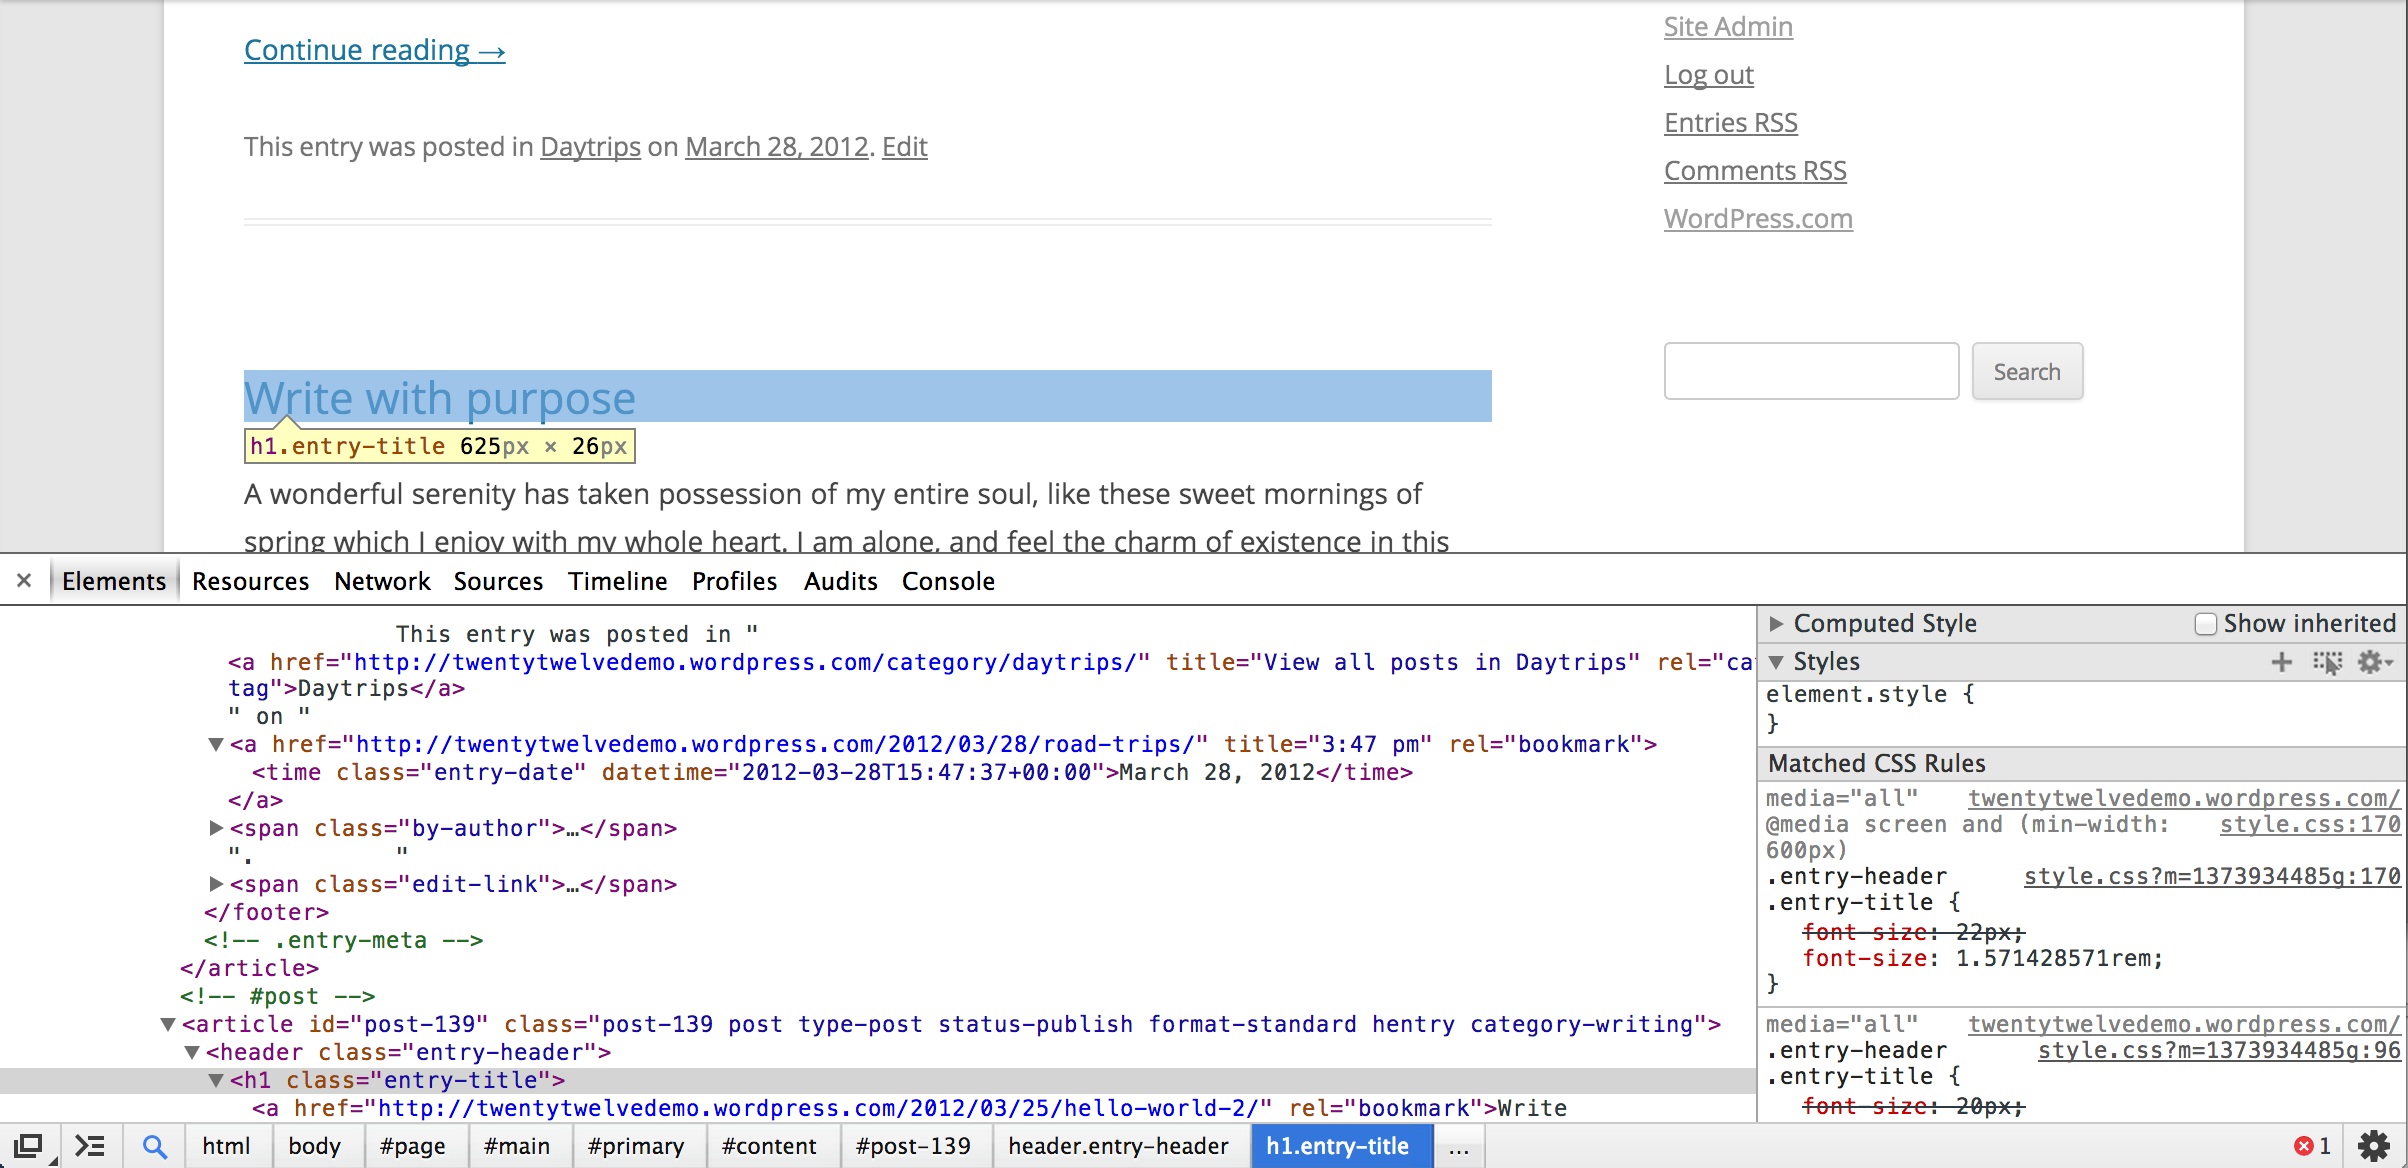
The selector is displayed as h1.entry-title in this theme.
Editing the CSS
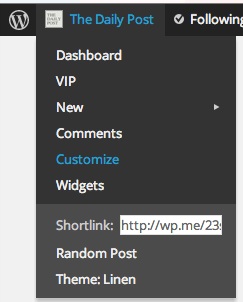
Now that you have the selector in hand, you can use it in your CSS Customizer tab. First, navigate to your Customizer, then choose the CSS option:
When the Customizer is open, you’ll see the post title (“Solace of a lonely highway”) and the CSS entry area:

When we add some CSS we can see the post title re-align accordingly:
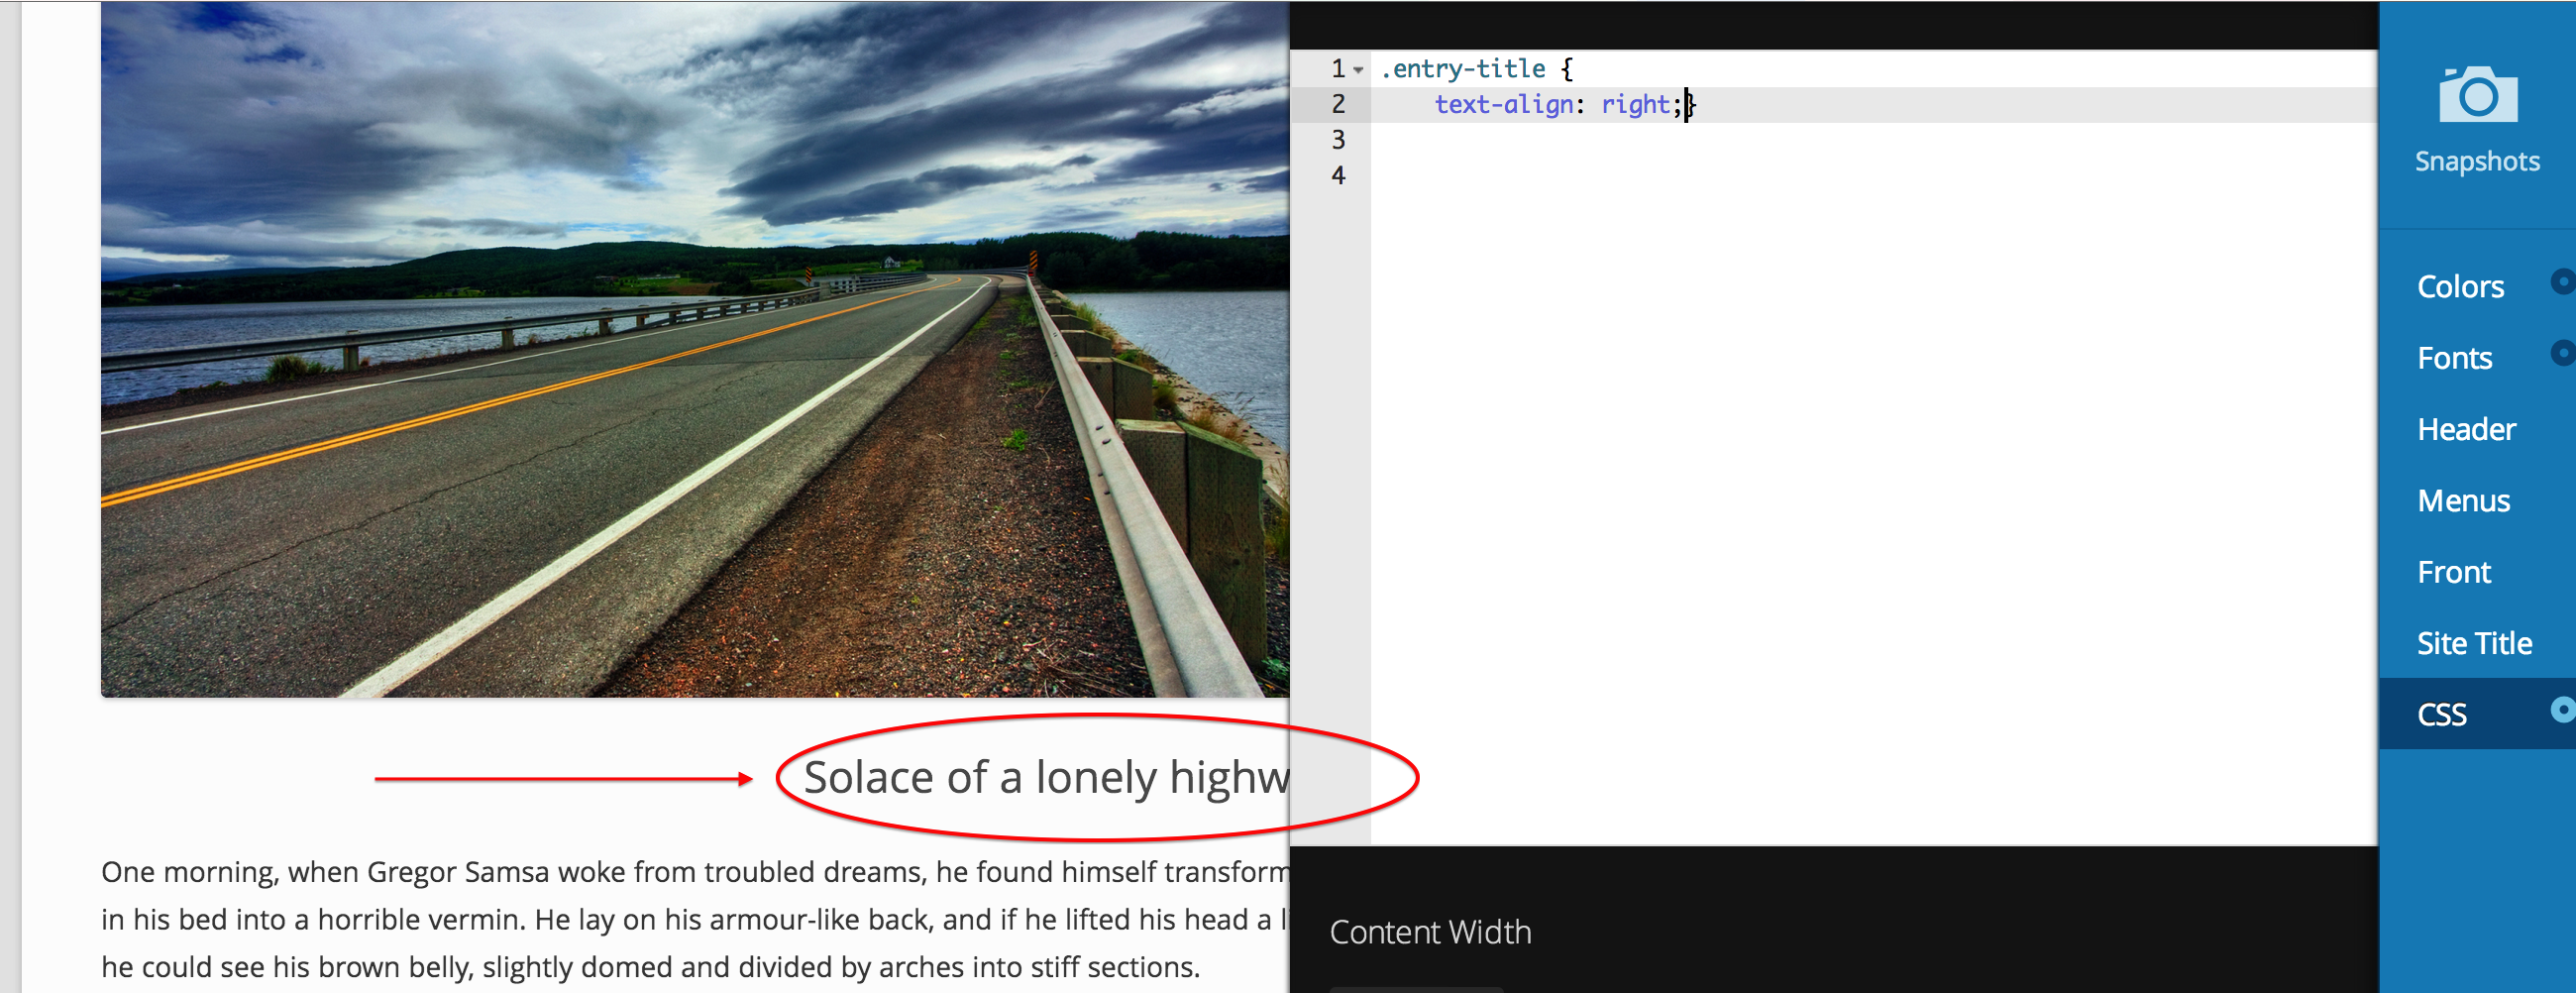
Using text-align: right; we can shift the title to align on the right instead of the left.
We know that the selector displayed as h1.entry-title, but it works as just .entry-title. A quick way to discover how much of the selector you should use is to plug it into the Customizer and see if it works the way you want it to! We used the text-align declaration here with right so the text aligns on the right, but it also accepts left and center — why not try both of these, too, and see what happens?
If you want to copy and paste the code I used into your CSS tab, here it is:
.entry-title {text-align: right;}
As soon as you enter valid CSS into the Customizer, you’ll see your change take effect! Testing CSS right in the Customizer is a no-risk method — you can erase it if you don’t like what you see, and no one else can see it before you save it.
If you’d like some additional resources on editing CSS, browse our support page on Custom CSS, and don’t forget to check out the recommended resources at the bottom. In the next post, we’ll explore the Matched CSS Rule pane, and see how you can use it with the Customizer to get these selectors working for you!
You might also enjoy these related posts
- An Intro to CSS, or How to Make Things Look Like You Like
- Branding Your Blog: Let’s Get Visual 101
- Add a Custom Background
Currently blogless? You’re a click away from sharing your story.
Create your blog at WordPress.com


My God…will need to read and re-read to make sense of it. Thanks for putting them all down in one place
LikeLiked by 1 person
Yes, I feel the same as JAYANTADEEPA and I’m so grateful that you posted this. I keep clicking on CSS and then clicking off of it. I have no idea what I would do with it. But, now I have something to sink my teeth into.
LikeLiked by 1 person
Thanks for this post. As someone said before, I will read and re-read this. I wanted to get the custom design thingy for a long time, but kept changing my mind because of my (very) limited CSS knowledge. Going to enjoy these posts, keep them coming! 🙂
LikeLike
Glad you explained this. I’ve been wanting to learn more about it. I’ve read up on HTML and this adds to my knowledge base. 🙂
LikeLike
Reblogged this on Articulatepix.com and commented:
I am putting this one on my work schedule.
LikeLike
I’m so glad you’re doing these CSS series right now!
Just one question: if I change the alignement of a title like you did in the post, will this affect all titles on my blog or just one?
LikeLike
It will change them all. It’s the great power of CSS!
LikeLike
I definitely use Firefox, but my recomendation is to use DOM Inspector rather than Firebug.
LikeLike
Thank you a lot .
LikeLiked by 1 person
Reblogged this on Sevraj.
LikeLike
Thanks friend this is very helpful to me.
LikeLike
Super dica de aprendizado CSS !
LikeLike
I’ve been wanting to learn more about it. I’ve read up on HTML and this adds to my knowledge base.
LikeLike
I have no idea what I would do with it. But, now I have something to sink my teeth into.
LikeLike
en..yes Thanks for putting them all down in one place
LikeLike
Reblogged this on Simple PHP Blog.
LikeLike
You have perfect timing.
I am working on redesigning my site and didn’t know where to start.
This is a great resource for me.
LikeLike
Reblogged this on andersonlee16.
LikeLike
Fire fox’s fire bug is the best. I did all my customization using fire bug. The selector lets me select exactly that part of my site which I want to edit, shows the code, and also shows me instantly how the changes in code are affecting my site. Then I search for that code on my site using the customization menu and replicate those changes. I’m using triton lite theme. And I did all my customization using fire bug.
LikeLike
Reblogged this on jawadulhassanshah and commented:
good to see u…..
LikeLike