
Food photos are in the running to oust cat photos as internet darlings. Whether you write a recipe blog, post about Aunt Mary’s yearly Thanksgiving extravaganza, or like to share sculptural restaurants dishes on Instagram, lots of you are publishing food photos.
Food isn’t quite the same as people or landscapes — it’s easy to make a beautiful panorama look good; less so a bowl of beef stew. Edible subjects have nuances of color and texture, and food styling adds another artistic layer. To help everyone take photos to rival Bon Appetit, The Daily Post grilled six of WordPress.com’s most popular foodies on camera gear, lighting tips, styling, and more.
Say hello to our sweet, savory, and skilled shutterbugs:
- Kate at Finger, Fork & Knife.
- Theresa of The Craving Chronicles.
- Carrie of The Patterned Plate.
- Paola of Love + Cupcakes.
- Radhika of Just Homemade.
- Stewart of Putney Farms.
Today, we’re sharing their lessons on getting great shots with any camera, shot selection, and the most fun and challenging foods to shoot. (In Part 2, we’ll focus on props and styling.)
Natural light helps you get the most beautiful food photos, whether you’re using a point-and-shoot, dSLR, or cameraphone.

Bitter gourd in tamarind gravy, Just Homemade.
Kate: I prefer to use natural light as much as possible, as this gives the best results when shooting food. My shoot set-ups are often on the move as I try out different locations to find the best light.
Paola: Look for natural, indirect light. Shoot near a bright window but not a sunny one — direct sun will blow an image out and create harsh shadows.
There are also some amazing photography apps out there. VSCO is my favorite for adding filters and doing quick color corrections, and I like Squaready for cropping images to share on social media and Diptic for making collages.
Theresa: Good lighting makes all the difference. First, turn off the flash. (Once, I even went as far as to duct tape over a flash I couldn’t disable!) You want natural, diffused light.
Using natural light prevents harsh shadows and weird color casts on food you can get from incandescent or fluorescent lights. (Color casts from interior lighting show up especially prominently in cameraphone photos.) If you can’t avoid indoor lighting, use some of the great photography apps out there to make adjustments — my favorites are Snapseed and Afterlight. Also, don’t go overboard with the filters! When it comes to food, weird colors can be very unappetizing.
Get creative with angles for food photos that stand out from the crowd.
Kate: Don’t be afraid to experiment with different angles. Have fun with it, don’t try and be too fancy! Simple is best.

Pimms Tartlets, Finger, Fork & Knife.
Theresa: Try a variety of angles and framing. It’s easier to do with a small, portable camera and with digital photos, there’s no limit on how many photos you can develop, so experimenting is low-cost.
Some point-and-shoots give you the ability to adjust the aperture, so if you can, experiment with different apertures too. Avoid “digital zoom” on point-and-shoots and camera phones — it yields pixelated photos. Just get close to your subject.
Radhika: Perspective makes a picture beautiful. When taking a picture, take a minute to think about what you wish capture in the frame. Is it just the clouds, or the view of the tree and clouds together?
Stewart: The traditional “from the top” angle of food photography can be hard without specific light, equipment and/or settings. Top-down photos are also common, so it’s hard to stand out. Close-up, lower angles are easier with basic equipment, more forgiving and (we think) more appetizing. You can take some great shots with an iPhone or “snappy” camera at low angles.
You can use a point-and-shoot or cameraphone, and trade up if you get the photography bug.
Kate: I started Finger, Fork & Knife using a Panasonic Lumix. It was a great camera but didn’t offer me the control that an SLR could offer me.
When deciding which camera to replace the Lumix with I looked for a camera that had an 18 megapixel processor (at least), good low-light performance, was light, and durable.
Paola: Some of my favorite photos have been taken with my iPhone.
Carrie: I started with a Fujifilm Coolpix. It was a great little camera to get started with the foundations of photography. I traded up after I worked the Fujifilm to death, using all the options available and feeling frustrated by its limitations.
I chose my camera because it sat naturally in my hands. I wanted it to be comfortable to manipulate, with a good grip and easy to reach buttons.
Stewart: We started with a Nikon dSLR and a 18-55mm lens, and an iPhone. The big “trade up” was a good Macro lens — we use it for a majority of our photos.
Theresa: If you think you might be ready to upgrade, go to a store and try out different cameras and lenses. If you don’t have a store nearby, there are websites that rent both camera bodies and lenses for very reasonable prices. No one else will be able to tell you what gear YOU will be most comfortable with.
It can take a lot of shots to get five perfect pictures for a blog post. (Thank goodness for digital cameras!)

Cauliflower crust pizza, Love + Cupcakes.
Theresa: I’ll take anywhere from 12 to 60 photos for a blog post. Some dishes look great right away and I’ll have six or more great shots to choose from out of maybe 25 for the final post.
With other recipes, I struggle to get the styling just right, so I’ll take 50 or 60 photos with various props and compositions, and only get one or two I like enough for the final post.
Paola: For a single post, I take anywhere from 150-300 photos, and edit that down to three to six for the final post. I follow the rule that more is better — it gives you options and ensures that you have at least one usable image. And since most of us use a digital camera, there’s no waste.
Carrie: It used to be near on 100! It’s starting to slowly come down and the last post must have been around 30 shots to get an average of three to five for one post.
Radhika: Anywhere from twenty to eighty. Sometimes if I get lucky, as few as ten and other times, over a hundred if I am shooting several ingredients, techniques and couple of different themes. Finally, about four to six pictures make it on the blog.
Stewart: We take a lot of images, usually 80-120 images per post, depending on the steps, ingredients and available light. We first prune out images based on focus, then light, then composition. We then pick eight to twelve images for post-processing.
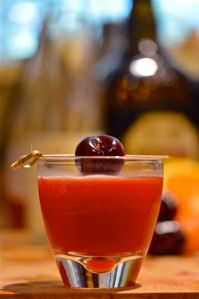
La Baur au Lac cocktail, Putney Farms.
Bloggers use everything from iPhoto to Photoshop to tweak their photos — but do it sparingly.
Theresa: My goal is to get as much of the shot perfect in the camera as I can, so that my post-processing is just some quick adjustments to contrast, white balance, and curves or levels.
Post-processing is my least favorite part of photography, so I try to make it as painless as possible! All of my post-processing is done with Adobe Bridge and Photoshop CS4.
Carrie: I’d say the post-editing is as important as taking the photo in the best conditions, but cropping, tweaking, and saturation can all serve to enhance the original. There’s a limit to how far I can go so that I don’t misrepresent the final result. If a lemon bar wasn’t actually neon yellow, saturation levels are reduced accordingly! I post edit my photos primarily with Adobe Photoshop.
Stewart: Software-wise, we just use iPhoto. Post-processing for us is mostly cropping images, with some work on saturation and contrast; we do very little editing. We will sometimes play with the color on cocktails, but we try to make our cooking photos as close to real-life as possible.
Colorful foods with height are fun to photograph…

A tea party table from The Patterned Plate.
Theresa: Fresh fruits and vegetables! They’re so colorful and naturally beautiful, it makes my job as a photographer easy. Melted chocolate, caramel, and cheese are fun to photograph too because they’re all so enticing!
Paola: Foods that stack high always photograph well — cookies, pancakes, and waffles.
Carrie: Cake! It’s always pretty, has height and the only job I have is to capture that.
Stewart: Seafood, particularly shellfish, is always fun to photograph, — so many shapes, colors and presentations (plus we love to eat the dishes). Cocktails are also fun, because the colors, glassware and garnishes give you endless variations to play with.
…but brown foods and things that melt are tougher.
Kate: Challenging? Anything in a glass.

Ginger-Mango Ice Cream Sandwiches, The Craving Chronicles. (Great shots of frozen foods *are* doable!)
Theresa: Frozen foods stress me out! It’s tough to get the shot before everything melts into a puddly mess. Brown foods are tough too, because they tend to look boring in a photo. And soups! It can be hard to highlight all of the good ingredients in a soup.
Paola: Foods that melt are the most challenging. Ice cream and popsicles are the hardest to shoot since the process is so time sensitive. I do a lot of running back and forth to the freezer between shots.
Radhika: Some of the brown Indian curries are a challenge, especially when the dish is not normally garnished and has little texture.
Stewart: Biscuits, scones, and basic cookies are very hard — they are somewhat monochromatic, most often brown. We garnish with lots of fruits, mint, butter, and jam to get colors and textures into these photos. Oven shots also bring things to life.
_____________________________________________
Garnishing less-photogenic foods is one easy way to bring color and contrast to a photos, but our pros have other tips and tricks any home cook can use to create a blog-worthy spread. In Part Two, we’ll dive into props and styling.
Do you have any food photography secrets, or questions for our pros?
Currently blogless? You’re a click away from sharing your story.
Create your blog at WordPress.com


The food photos are delicious.I like the cake decoration.
LikeLike
It’s almost deliciously wicked to impose these on unsuspecting visitors! Beautiful photography of great eatables that are supposedly not good for you!
Thanks.
TOLA.
LikeLike
Maybe for the next post, I’ll include an “Eat Lunch First!” warning before the post 🙂
LikeLike
Got my mind going. I will try these suggestions. I have been an amateur photo-ist for years. Need advice on cameras and angels and all of that. And will try to reread this post. Thanks a lot. Maybe start a new board on Pinterest.
LikeLike
Thanks. Very helpful.
LikeLike
My food photography secret is to keep it simple and use small plating. I used to try to get very elaborate in my setups, but that ultimately took away from the food item I was trying to photograph. And small plates are easier to get up close to so you can get the full dish in the photo. Finally, natural lighting is a must!
LikeLike
Beautiful food pics. I always prefer the pics to the ‘sweet’ things, though. Sweet is too sweet for me. 😉
LikeLike
Some great tips here, I haven’t really ventured into food photography, but that’s probably because the few foodie photos that I have taken have looked, quite frankly disgusting. Obviously wasn’t doing something right, some ideas to take away and think about though… 🙂
LikeLike
The second part of this post will have lots of specific tips on plating, props, and arranging food — stay tuned!
LikeLike
I love it with a Passion
LikeLike
Now I don’t feel so bad about the number of pictures I take to get a few I’m happy to use in my posts! 🙂
LikeLike
Good food photography always makes me hungry! Ace shots!
LikeLike
Can’t wait to take some great shots!
LikeLike
Loving this series already! Could use all the help I can get with food photography!
LikeLike
All great suggestions:) . My best purchase was a reflector for around $30. This works brilliantly if you use the natural light as a back or sidelight, then the softer light fom the reflector fills in the front of the food.
LikeLike
Best post ever! I am an aspiring food stylist and loved all the insider tips. I have a question for the bloggers, are all your props just collected over the years? I think I am going to have to start a separate cupboard just for all my props, they are taking over my kitchen and some are just too pretty to use!! Haha
LikeLike
I like what my EYES see. Please give us more Food Photos
LikeLike
I don’t particularly like food blogs per se. I find a lot of the recipes incredibly pretentious with the most unbelievable range of ingredients. Having said that, I do follow a few selective ones (vegan) and do post food pix and recipe pages on mine! Some of my readers are interested in food photos/recipes, some aren’t. I tend to include the food pix if they are vaguely relevant to the post, eg using something out of the garden, what’s in season locally, specific local ie Spanish recipes. Sometimes, I add food photos just to lighten up a post.
I did write one post which was mainly a recipe one, but I confess it was a satire on food blogs being Freshly Pressed. http://wp.me/p1XwsS-Zx It appealed to my readership however.
You are right about the popularity of food posts in general. My top hit in terms of internet searches continues to be one for olive pate, but that’s probably because it comes up third on the first page of a google search.
What’s also interesting is when personal bloggers ie rather than food bloggers, write about food, they invariably attract discussion. I’ve also written posts about food – fish, bacon, cheese, vegetarian, vegan – on one of my other blogs, and received some great comments. There were no photos, so it’s not just the pix that attract people. But when there are pix, whether it is a meal out or one at home, I think part of the interest is the insight into someone’s life. So some food photos/recipes on a non-food blog from time to time can interest readers, maybe worth saying that in a future post. You don’t need to have a food blog to post food photos.
LikeLike
LikeLike
Now I know why my brown apple cake was so hard to get a good photo of! Thanks for all these yummy tips!
LikeLike
A BUFFET of good advice!
LikeLike
Thanks so much for the excellent tips.
LikeLike
Thank you for these tips! I’m interested to hear about how to style foods. I totally agree that soups are hard to photograph! Mine are always too shiny.
LikeLike
UO
LikeLike
JH
LikeLike
Hi
Love photography- and I know too little about the details;)! I would love to learn- !!!!
Thank you for all hints
Debra leffe
LikeLike
Thanks! I’m now more inspired both by the cooking aspects and the photography!
LikeLike
HI
LikeLike
My (then teenaged) son had a recipe blog for a while, which entailed me trying to realize his unusual food visions, and then photographing the results. I must say it was a lot of fun, and I did learn a lot just by doing it and trying different things. And it was a great excuse to explore op shops/thrift stores for props!
LikeLike
Being a foodie, I always feel that it is necessary to give justice to the food by taking photos of it well and these tips are excellent.
LikeLike
Thanks for sharing these great tips!
LikeLike
Do not send me Daily Post
Sent via my BlackBerry from Vodacom – let your email find you!
LikeLike
great post! If brown food is hard to photograph, give me a tip for a good shot of dips – not texture, colors white to beige. Had to take I-dont-know-how-many pictures of my Greek fish-roe dip (Taramosalata). Result? hm…. Easy to make but hard to photograph.
But I am a foodblog newbie, so I can only learn.
LikeLike
please visit my blog 🙂 http://www.journeythroughlife15.wordpress.com/
LikeLike
awwww … those Tartlets look so delicious …
PS: thanks for sharing the advices, success in food blogging is 90% photography skill and 10% cooking skill (in my opinion) .. so its pretty helpful
LikeLike